Revert or Delete a Content Item
You can request that a content item be reverted to a previous version. Area Support approves or rejects the request.
- Open the content properties drawer for the content item. See Content Properties Drawer.
-
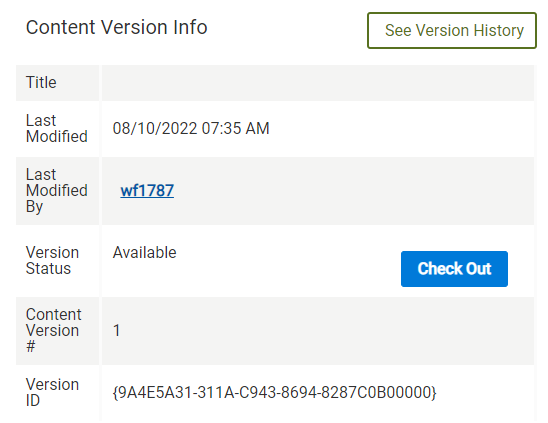
In the Content Version Info panel, click the See Version History button.
-
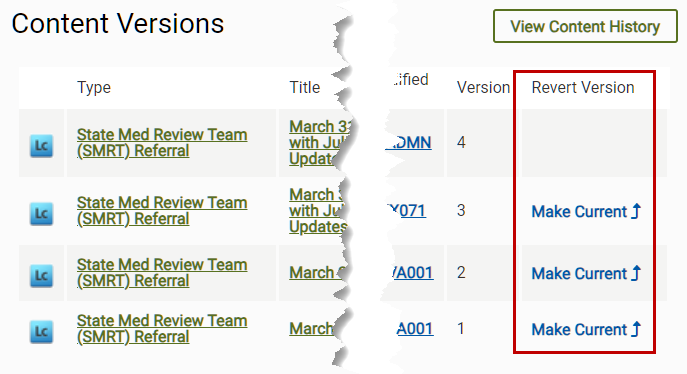
On the Content Versions page, in the Revert Version column, click Make Current for the version that you want to revert to.
-
Select a reason (required) and enter an explanation (optional).
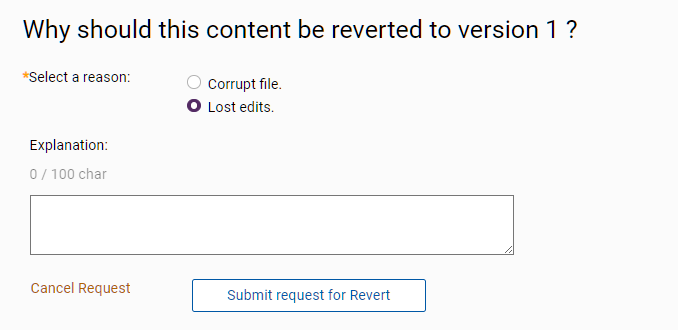
- Click the Submit Request for Revert button.
- While the request is being reviewed, the content item is available only for viewing.
- If the request is approved, the previous version is assigned the next number in the version sequence. For example, the current version is 5, and you want version 4 to be the current version. Upon approval, version 4 becomes the current version, and it is assigned version 6. Version 4 remains in the version list.
- When the request is complete, a Result to Requester notification is added to your My Notifications list. You can acknowledge the notification.
You can request that any content item be deleted. Area Support approves the request, rejects the request, or fixes the content item without deleting it. If Area Support approves the request, Records Management gives the final approval, rejects the request, or fixes the content item without deleting it.
- Open the content properties drawer for the content item. See Content Properties Drawer.
-
In the Content Version Info panel, click the See Version History button.

-
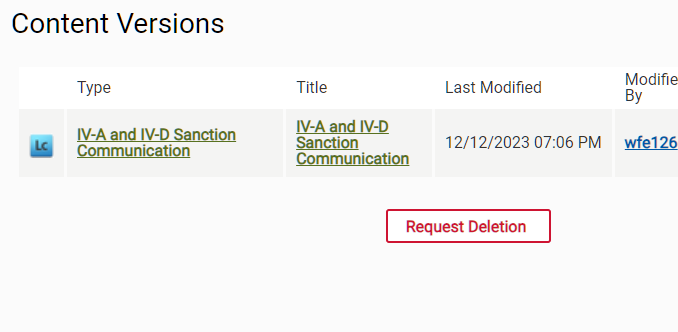
On the Content Versions page, click the Request Deletion button.
-
Select a reason (required) and enter an explanation (optional).
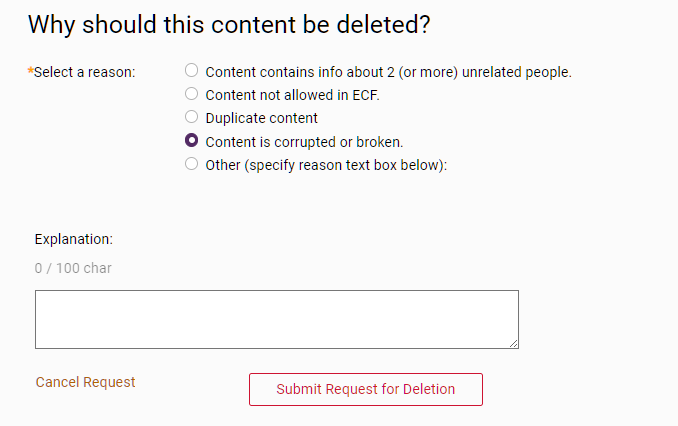
- Click the Submit Request for Deletion button.
- While the request is being reviewed, the content item is available only for viewing.
- If the request is approved, the content item is deleted.
- When the request is complete, a Result to Requester notification is added to your My Notifications list. You can acknowledge the notification.
To keep one version of a content item and delete the rest of the versions, save the latest version that you want to keep as a new content item and request that all versions be deleted.
- Open the content properties drawer for the content item. See Content Properties Drawer.
-
In the Content Version Info panel, click the See Version History button.

-
On the Content Versions page, open the latest version that you want to keep.
- Do one of the following, depending on the format of the content item:
PDF or TIF format: On the content viewer toolbar, click the Download as original button (disk icon). The file is saved to your Windows Downloads folder.

Blue LiveCycle format: On the content viewer toolbar, click the Save button (download icon). The file is saved to your Windows Downloads folder.

- Red LiveCycle format: The file is saved to your Windows Downloads folder.
- Upload the content item from the Downloads folder to ECF as a new content item. See Upload Content.
- Request that all versions of the content item be deleted. See Deleting a Content Item: All Versions (above).
