Upload Content
- If you are uploading a Microsoft Office document or PDF form, prepare the content item for upload:
- Word, Excel, or PowerPoint document: Open the document. Click the File menu, and choose Save as Adobe PDF. Click the Save button to save the PDF. Note: Upload the PDF.
- PDF form: Open the form. From the Menu, select Print. Select the Microsoft Print to PDF printer. Click the Print button. Choose the location where you want to save the file (suggestion: Downloads folder). Enter a file name. Click Save to flatten the PDF. Flattening the PDF prevents further editing. Note: Upload the flattened PDF.
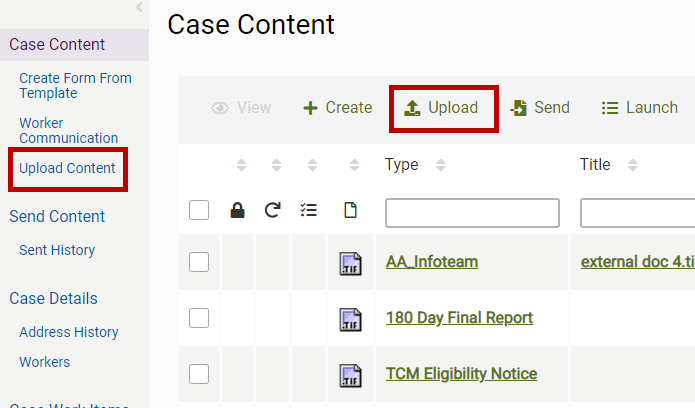
- Do one of the following:
- On the sidebar menu, click Upload Content.
- On the content menu, click Upload.
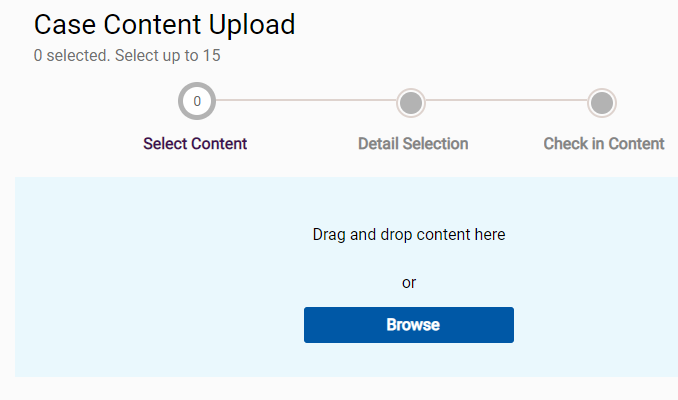
- Do one of the following:
- From Windows File Explorer, drag and drop up to 15 files onto the shaded box.
- Click the Browse button and select up to 15 files.
The maximum file size is 150 MB.
- If you selected an unsupported file type, the content name is listed in the Unsupported File Types table.
- You can continue the content upload process without taking any action, but the unsupported content is not uploaded.
- To remove a content item from the Unsupported File Types table, click the Remove button (trash icon).

What content types are supported?
- Click the Select Details button.
Repeat this procedure for each content item in the Case Content Upload table.
- To remove a content item from the Case Content Upload table, click the Remove button (trash icon).
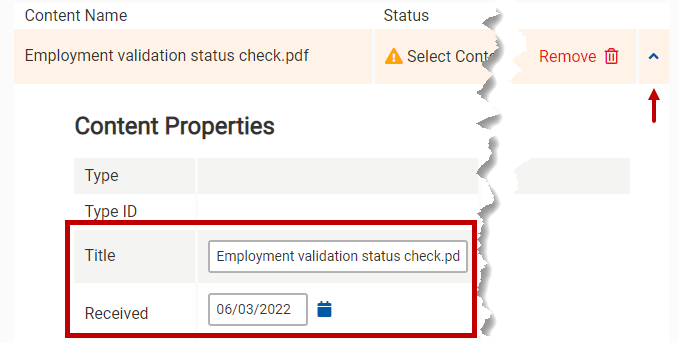
- Open the drawer for a content item.
-
In the Content Properties panel, you can edit the title and received date.
- Title: Maximum of 100 characters. Only alphanumeric characters, spaces, dashes, and underscores are allowed. If you try to paste a title that contains an illegal character, no characters are pasted. Periods in the original title are allowed. However, if you add a period while editing the title, the upload process fails. The field can be blank.
- Received: The date must not be in the future.
-
Click a Show Content Type button to filter the content type list:
- My Favorites: Default filter. Content types that you have added as favorites. See Adding or Removing Content Type Favorites (below).
- My Work Area: Content types that your work area uses. You can set your work area on the Settings page. See Settings.
- All: All content types.

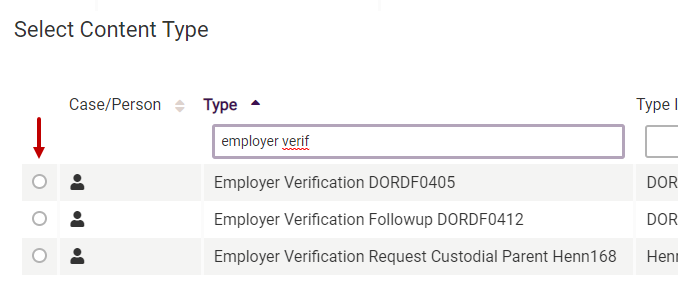
- You can sort and filter the selected content type list. See Sort and Filter.
-
Select a content type for the content you are uploading.
-
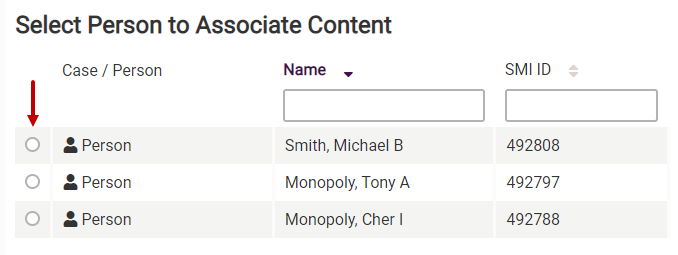
Person content only: Click the Select Person button. Select a person to associate with the content.
-
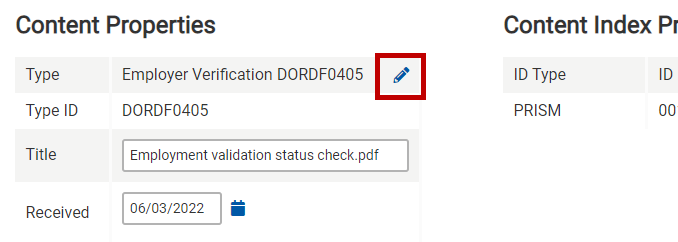
To edit the content type, click the Edit button (pencil icon) in the Type field of the Content Properties panel. Select another content type.
- Tip: Close the drawer for the content item.
- When you are done, check in the content to ECF (next).
- Click the Check In Content button.
-
On the Case Content list, click the Refresh List button. The new content items appear at the top of the list.

To add or remove a

You can add up to 100

