Area Support Requests
The Area Support Requests page shows notifications of requests from workers for reverting content items to a previous version and deleting content items.
Area Support staff only: To process revert and delete requests, do the following.
- On the navigation bar, click the Notifications button.
-
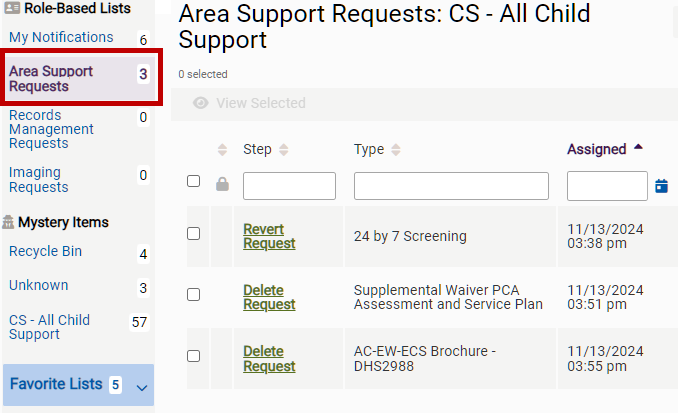
On the sidebar menu, click .
-
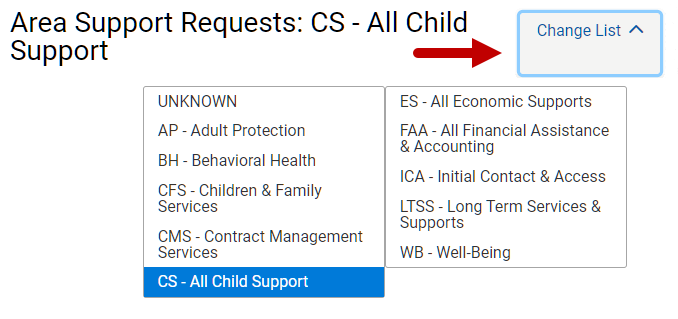
The revert and delete requests are shown for the work area that you selected on the Settings page. See Settings. To view requests for another work area, click Change List and select the work area.
To update the notifications list with new items, click the Refresh List button.
To update the notifications counts on the sidebar menu, click the Refresh Sidebar button.
You can sort and filter the notifications list. See Sort and Filter.
To view the case or person file, click the number in the ID # column.
- In the notification list, do one of the following:
- One item: Click the request in the Step column. The request opens in a new tab.
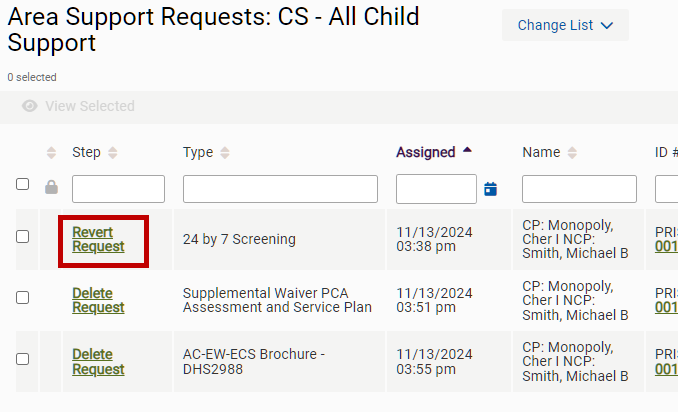
- Best practice: If you want to open multiple requests, first open one item, and log in to the IBM Content Navigator. Then open the rest of the requests.
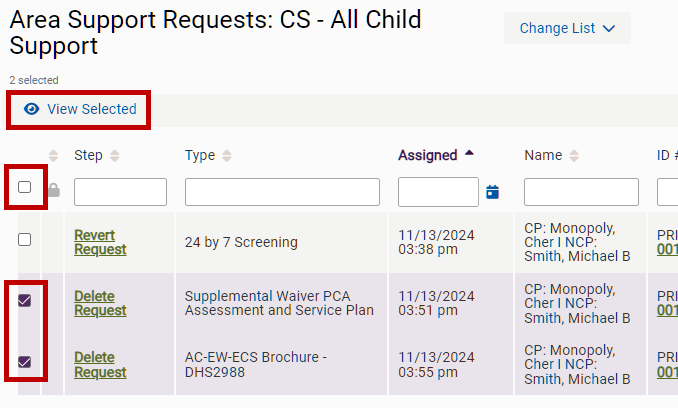
- Multiple items (up to 15): Select the check boxes next to the requests that you want to open. To select all requests, click the top check box. On the content menu, click View Selected (eye icon). Each request opens in a new tab.
- One item: Click the request in the Step column. The request opens in a new tab.
-
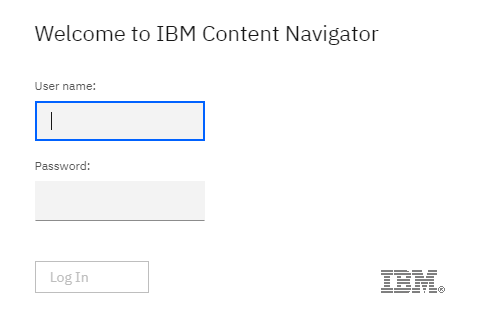
If the Welcome to IBM Content Navigator window appears, type your network ID and password, and click the Log In button.
- On the sidebar menu, review the information about the request.
-
Do one of the following:
-
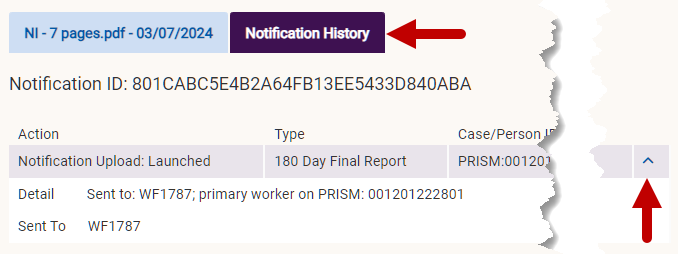
View notification history: Click the Notification History tab (actual text on tab may vary from illustration). To view history details, click the arrow at the end of the history item row.
-
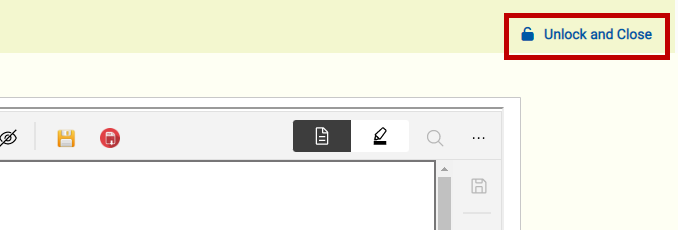
Close the notification without completing it: Click the Unlock and Close button. On the notifications list, click the Refresh List button to display the full notifications list.
-
Complete the revert request or delete request (next).
-
Transfer the request to the notifications list for another work area (below).
-
-
To add a detail about the request, do the following:
- Click the Add Detail button.
- Type the detail or copy and paste the detail into the field (up to 100 characters). See Copy and Paste.
- Click the Save Detail button.
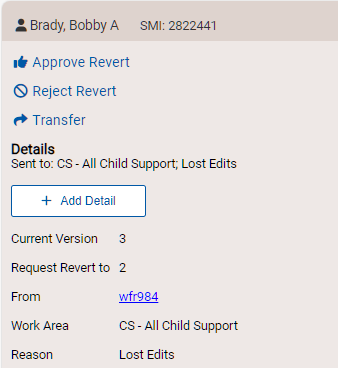
- To complete the revert request, do one of the following:
- Click the Approve Revert button. The request is removed from the Area Support Requests list, and a Result to Requester notification is added to the requester’s My Notifications list. The content item is reverted, as requested.
- Click the Reject Revert button. The request is removed from the Area Support Requests list, and a Result to Requester notification is added to the requester’s My Notifications list. The content item is not reverted.

-
To add a detail about the request, do the following:
- Click the Add Detail button.
- Type the detail or copy and paste the detail into the field (up to 100 characters). See Copy and Paste.
- Click the Save Detail button.
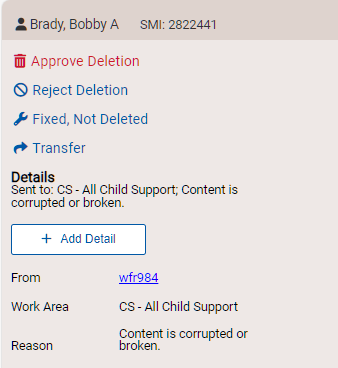
- To complete the delete request, do one of the following:
- Click the Approve Deletion button. The request is removed from the Area Support Requests list, the notification is added to the Records Management Requests list, and an email is sent to Records Management and ECF Support.
- Click the Reject Deletion button. The request is removed from the Area Support Requests list, and a Result to Requester notification is added to the requester’s My Notifications list. The content item is not deleted.
- Click the Fixed, Not Deleted button. The request is removed from the Area Support Requests list, and a Result to Requester notification is added to the requester’s My Notifications list. The content item is fixed without deleting it. For example, if the content item was added to the wrong case, it is reindexed.

You can transfer a request to the notifications list for another work area.
-
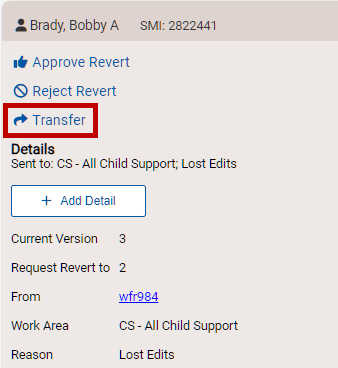
On the sidebar menu, click Transfer.
-
In the Transfer to List list, select a work area or Unknown.
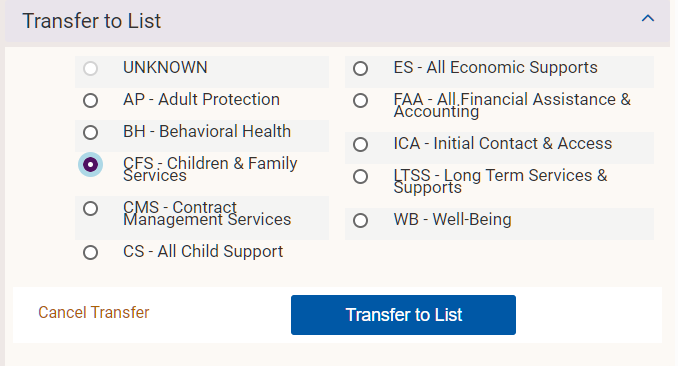
- Click the Transfer to List button. The notification unlocks and closes. It is removed from the current notifications list and added to the selected notifications list.
