Content Properties Drawer
Click the arrow at the end of the content item row to open, expand, or show the content properties drawer.
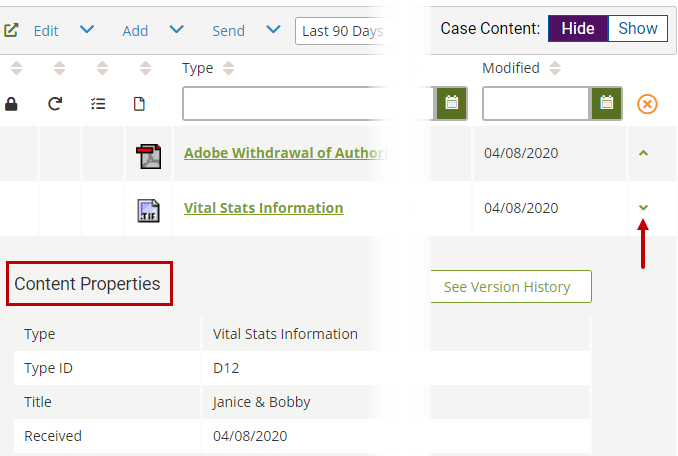
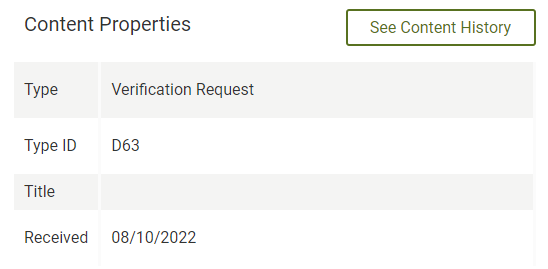
Type: The content type of the content item, as identified in the ECF Next forms taxonomy The organization of ECF forms by type or subject.. For a list of forms in the taxonomy, see the ECF Taxonomy Report (link to report is under Resources).
Type ID: The content type identifier.
Title: The name, or title, of the content item.
Received: The date that the content item was received in Health and Human Services.
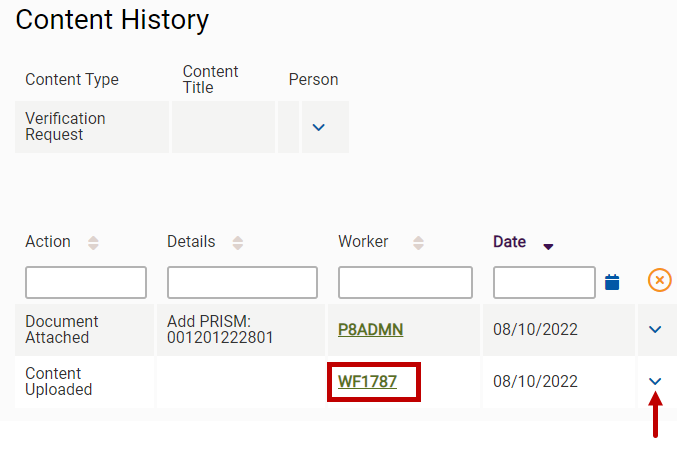
The Content History page shows a record of the actions taken on a content item.
-
In the Content Properties panel, click the See Content History button.

-
On the Content History page, you can sort and filter the history table. See Sort and Filter.
- To view information about the worker who took the action, click the network ID in the Worker column.
-
To view history details, click the arrow at the end of the history item row.
- To return to the content list, click Case Content or Person Content on the sidebar menu.
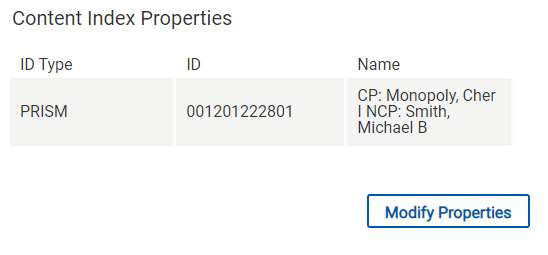
ID Type: The source system associated with the content item.
- Valid values for person content items: MAXIS PMI, PRISM MCI, MNsure ID, SMI, SSIS SWNDX.
- Valid values for case content items: MAXIS, PRISM, MNsure, SSIS.
ID: The person or case identifier.
-
Below the Content Index Properties panel, click the Modify Properties button.

- You can modify the following properties:
- Title and received date
- Index values
- Content type
You can modify the title. If you uploaded the content item, you can also modify the received date.
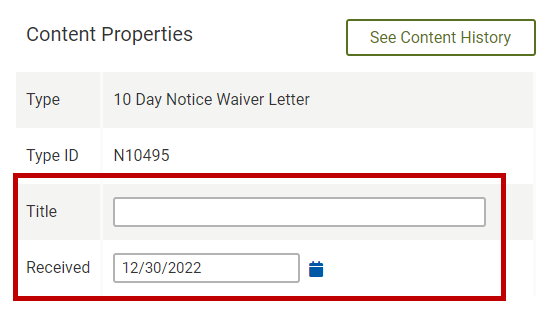
- In the Content Properties panel, edit the title and received date, as needed.
- Title: Maximum of 100 characters. Only alphanumeric characters, spaces, dashes, underscores, and periods are allowed. If you try to paste a title that contains an illegal character, no characters are pasted. The field can be blank.
- Received: The date must be in the future.
- Do one of the following:
- If are you done modifying properties, click the Save Properties button.
- If you want to add or delete index values, continue below.
You can add and delete index values An association to a case or person, consisting of the source system and ID (example: MAXIS 442181) to a content item. A content item must have at least one index value. Add a new index value before removing the existing one.
-
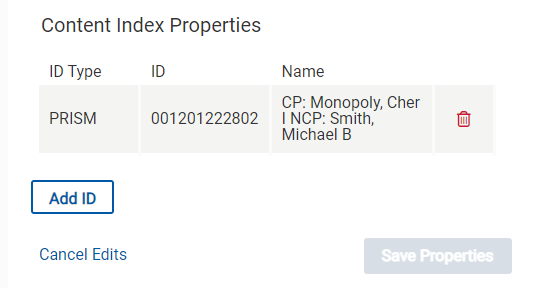
In the Content Index Properties panel, click the Add ID button to add a case ID to a case content item or a person ID to a person content item.
-
Do one of the following to add an index value:
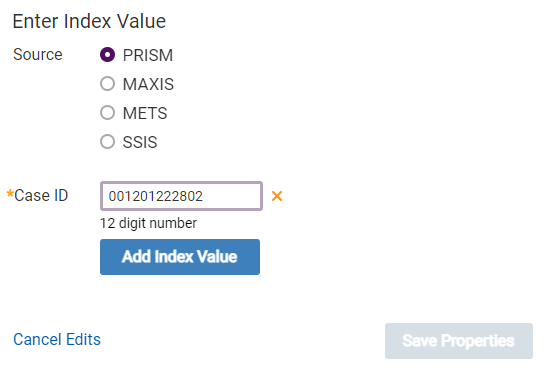
- Case content item: Select the source and enter a case ID. Click the Add Index Value button.
- Person content item: Select the ID type and enter a person ID. Click the Add Index Value button.
- To add additional index values, repeat step 2. You can add an unlimited number of index values.
-
To remove an index value, click the Remove button (trash icon).
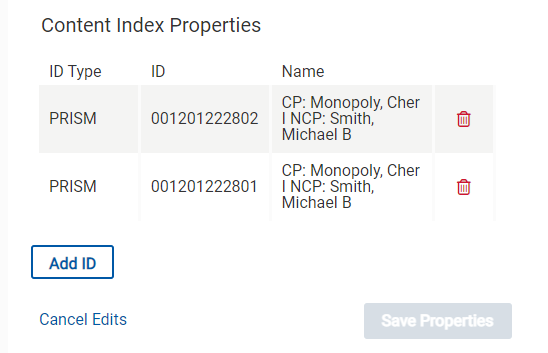
-
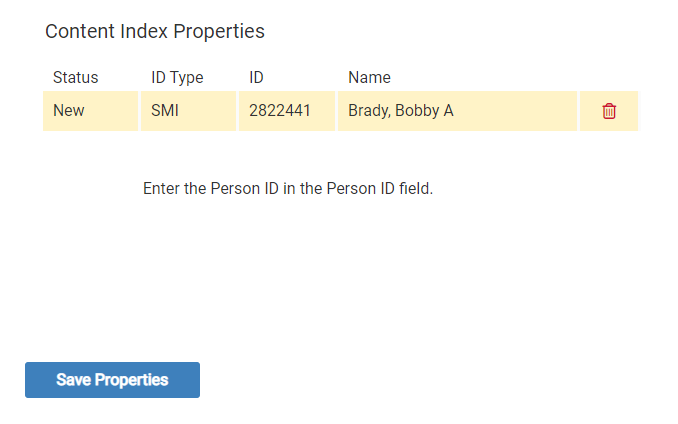
Index values that you have added are highlighted. When you are done, click the Save Properties button.
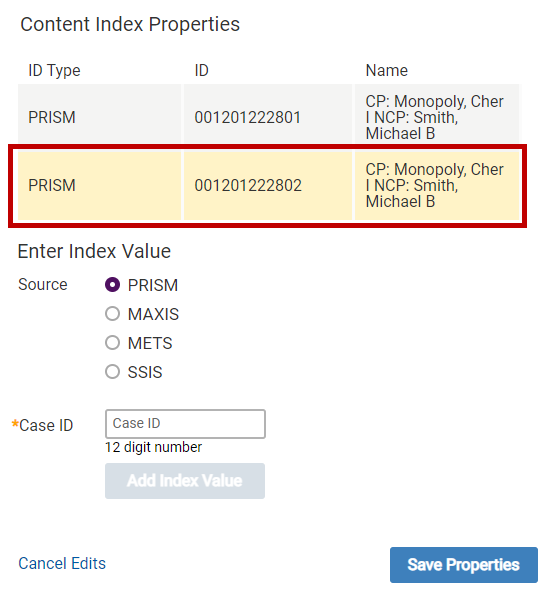
You can modify the content type and change the content type from person-related to case-related or vice versa.
-
In the Type field, click the Edit button (pencil icon).
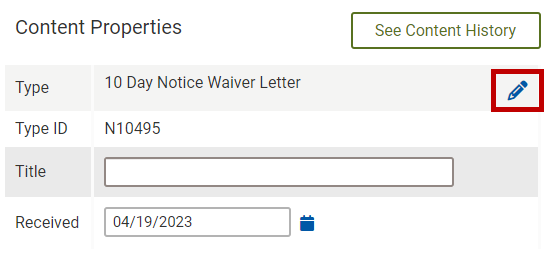
-
Click a Show Content From button to filter the content type list:
- My Favorites: Default filter. Content types that you have added as favorites.
- My Work Area: Content types that your work area uses. You can set your work area on the Settings page. See Settings.
- All: All content types.

- You can sort and filter the content type list. See Sort and Filter.
-
Select a content type.
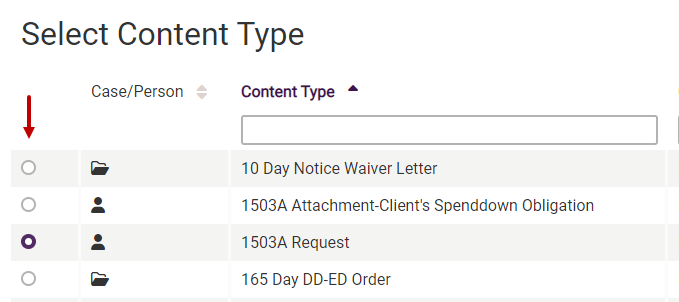
- Click the Next button.
-
If you changed the content type from person-related to case-related or vice versa, do one of the following to add an index value. Otherwise, go to step 8.
- Case content item: Select the source and enter a case ID. Click the Add Index Value button.
- Person content item: Select the ID type and enter a person ID. Click the Add Index Value button.
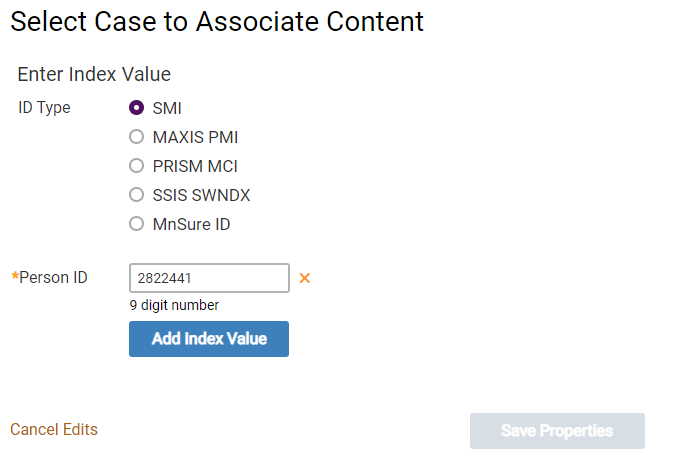
- To add additional index values, repeat step 6. You can add an unlimited number of index values.
-
Review the new properties in the Content Properties: New panel.
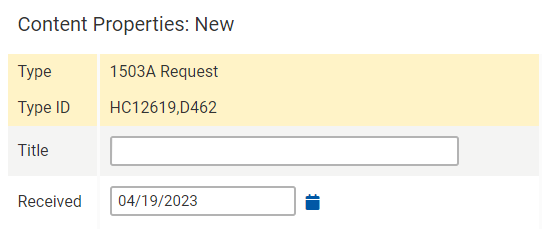
- Update the title and received date, as needed.
-
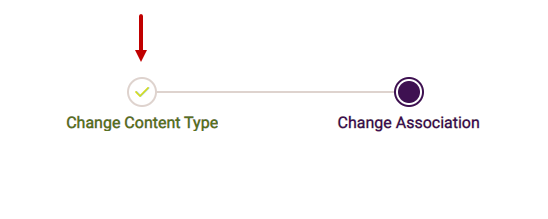
To change the content type, click the Change Content Type step. Go to step 2.
-
When you are done, click the Save Properties button.
Title: The name, or title, of the current version of the content item.
Last Modified: The date and time that the content item was last edited. If the content item has never been edited, the field is blank.
Last Modified By: The network ID of the worker who last edited the content item. If the content item has never been edited, the field is blank.
Version Status: The status of the current version of the content item.
Valid values: Available, Checked out (lock icon), Check in on form, Annotations Only, Final.
Content Version #: The sequence number of the current version of the content item. 1 is the first version. The number is incremented when a new version is added.
Version ID: The ID of the current version of a content item. FileNet, ECF Next’s content repository, assigns a unique ID to each version of a content item. The ID cannot be modified.
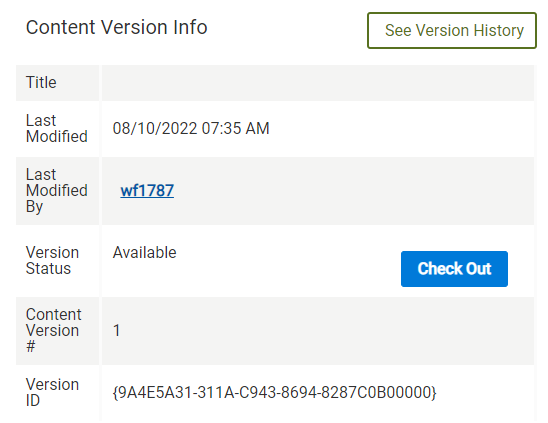
You can view previous versions of a content item, but you cannot edit a previous version.
-
In the Content Version Info panel, click the See Version History button.

-
On the Content Versions page, click the name in the Type or Title column to view a previous version.

- To return to the content list, click Case Content or Person Content on the sidebar menu.
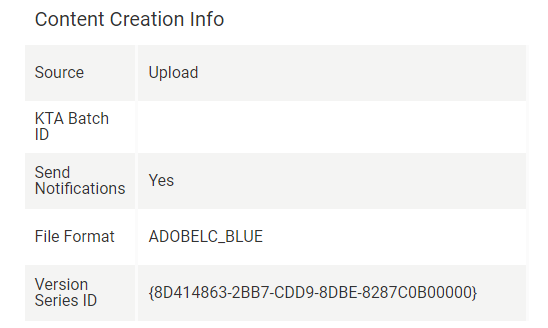
Source: The origin of the content item. The source cannot be modified.
Valid values:
- Scan: Mailed to Imaging Operations (IO)
- Fax: Faxed to IO
- Email: Emailed to IO
- Mobile: Mobile uploaded to IO
- Upload: Added by a worker
- Import: Added via secure file transfer (example: ApplyMN apps)
- DIAMOND: Transferred from another Health and Human Services document repository
KTA Batch ID: If added by IO, the IO-assigned document batch identifier. The ID cannot be modified. Kofax TotalAgility (KTA), the county’s document scanning system, scans content items in batches and assigns an identifier to the batch.
Send Notifications: Notification of workers when the content item was created. The value depends on the content type.
Valid values:
- Yes: Primary workers were notified.
- No: Assigned workers were not notified. Subscribers may have been notified.
File Format: The file format of the content item.
Examples:
- DOC, DOCX: Microsoft Word document
- JPG, PNG: Image file
- MPG: Video file
- PDF: Adobe PDF document
- TEXT: Text document
- XLS, XLSX: Microsoft Excel worksheet
Version Series ID: The ID of all versions in a series of content items. The version series ID is used to find all versions of a content item. FileNet, ECF Next’s content repository, assigns a unique ID to each series of content items. The ID cannot be modified.
