Subscriptions
The Subscriptions page shows notifications for content items for which you are not the primary worker (or secondary worker, where applicable) on a case. You can also view another worker’s subscriptions list.
You can create subscriptions to Upload and Imaging notifications for all cases or persons, for selected source systems, or for selected cases. You can create subscriptions for yourself or for another worker.
- On the navigation bar, click the Notifications button.
-
On the content menu, click (bell icon).

Select a worker from the favorites list or search for a worker.
On the sidebar menu, select a worker’s name from the Favorite Lists.
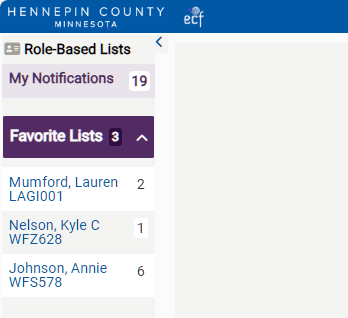
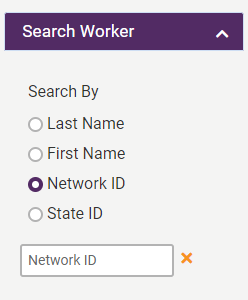
- On the sidebar menu, open the Search Worker drawer.
-
In the Search By list, select Last Name, First Name, Network ID, or State ID.
-
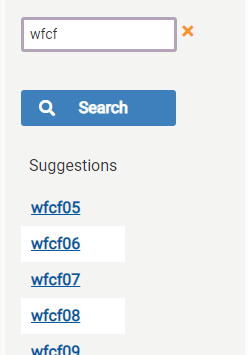
In the Search field, type the required information. After you type the minimum number of characters (minimum varies), suggestions appear and the Search button becomes active. To clear the Search field, click the x next to the field.
-
Either click the Search button or click a suggestion.
- In the search worker results, do one of the following:
- To view the worker’s notifications, click the worker’s name in the Name column.
- To view the worker’s user information, click the worker’s network ID in the Network ID column.

-
On the content menu, click View Subscriptions (bell icon).

-
To return to your subscriptions list, click My Notifications on the sidebar menu, and click View Subscriptions (bell icon) on the content menu.
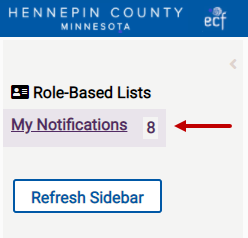
To update the notifications list with new items, click the Refresh List button.
You can sort and filter the notifications list. See Sort and Filter.
To view the case or person file, click the number in the ID # column.
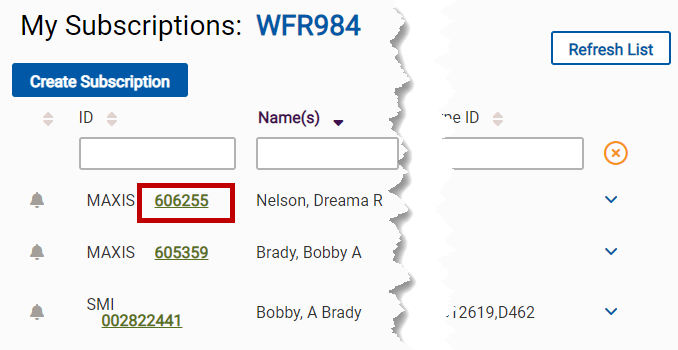
You can create a subscription for yourself or for another worker.
- View a subscriptions list.
-
Click the Create Subscription button.
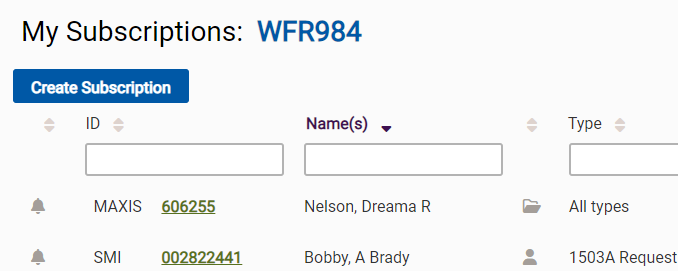
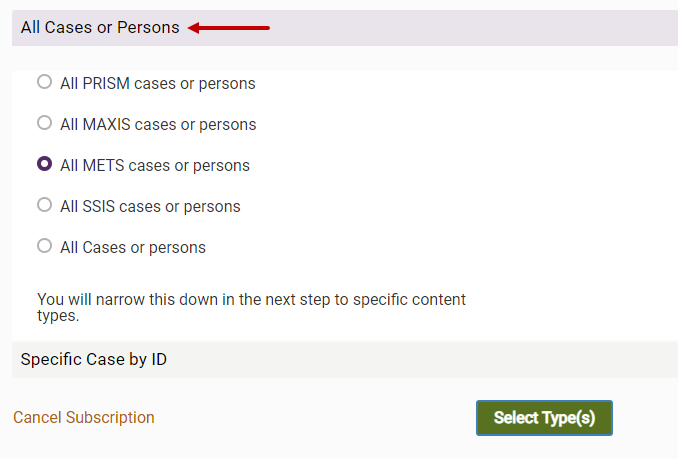
- Do one of the following to select a source:
In the All Cases or Persons section, select All source system Cases or Persons (example: All METS Cases or Persons) or All Cases or Persons.
In the Specific Case by ID section, select a source system and enter the ID.
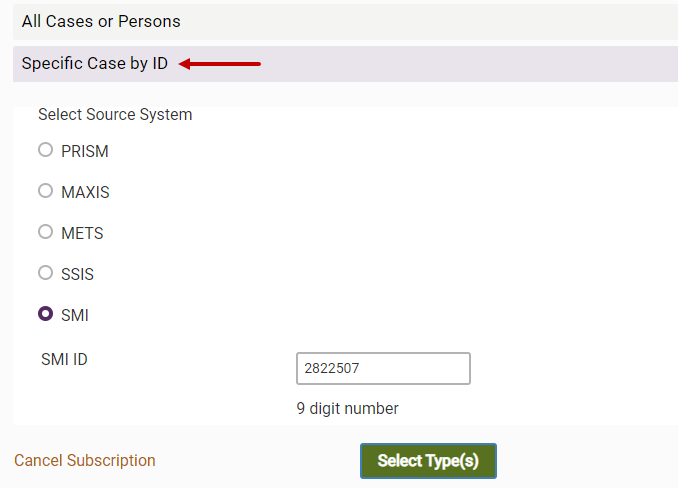
- Click the Select Types button.
- If you entered a specific case in step 3, do one of the following:
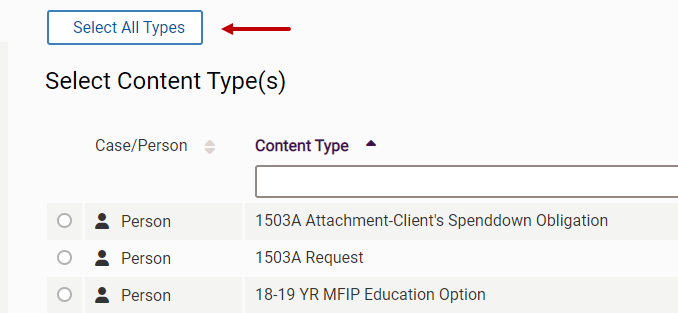
Select all content types: Click the Select All Types button. Go to step 9.
- Select one content type: Go to step 6.
-
Click a Show Content From button to filter the content type list:
- My Favorites: Default filter. Content types that you have added as favorites. See Adding or Removing Content Type Favorites (below).
- My Work Area: Content types that your work area uses. You can set your work area on the Settings page. See Settings.
- All: All content types.

- You can sort and filter the content type list. See Sort and Filter.
-
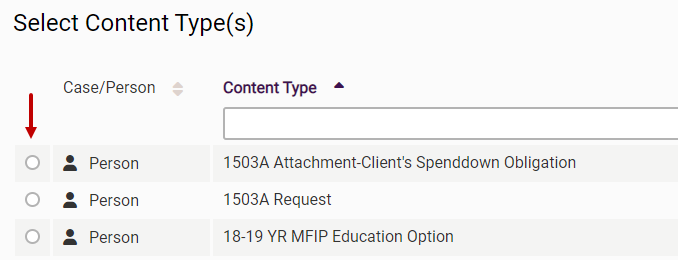
Select a content type.
- Click the Review & Subscribe button.
-
Update the subscription, as needed.
-
To change the source, click the Select Source step. Go to step 3.
-
To change the content types, click the Select Types step. Go to step 5.

-
-
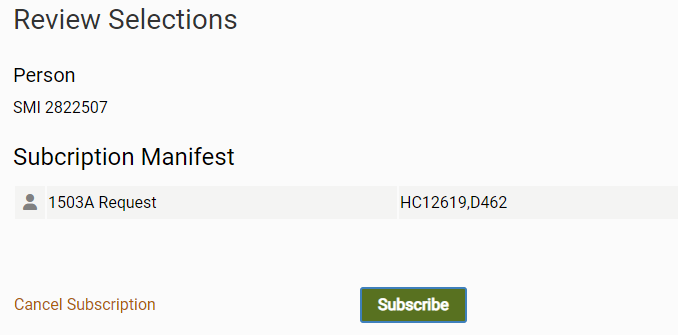
Click the Subscribe button. The subscription is added to the Subscriptions list.
You can delete any subscription on your subscriptions list, even if you did not create it. Area Support and Production Support can also delete your subscriptions.
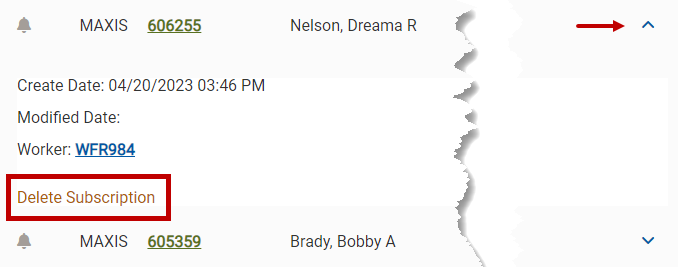
- Click the arrow at the end of the subscription row to open, expand, or show the subscription details.
-
Click the Delete Subscription link.
To add or remove a

You can add up to 100

While viewing another worker’s subscriptions list, you can add or remove worker favorites. See Viewing Another Worker’s Subscriptions List > Search for a Worker (above).
You can favorite up to 25 workers throughout ECF Next.
Worker favorites appear in the Favorite Lists on the sidebar menu.

